
I built a writing desk!

My girlfriend’s a teacher who finds herself teaching from home these days, as many teachers do, but without a proper desk. She asked if I could build her one, using some rescued 1x10 boards she had at her house. Absolutely, I could. She found some plans for a writing desk she liked; it reminded me of a really similar desk I watched Steve Ramsey build on his YouTube channel a few years ago. So with rescued lumber (and by rescued lumber, I mean, I think the desk is this wood’s third post-tree life?) and Steve’s plans in hand, I got busy. (Heads up, affiliate links ahead.)
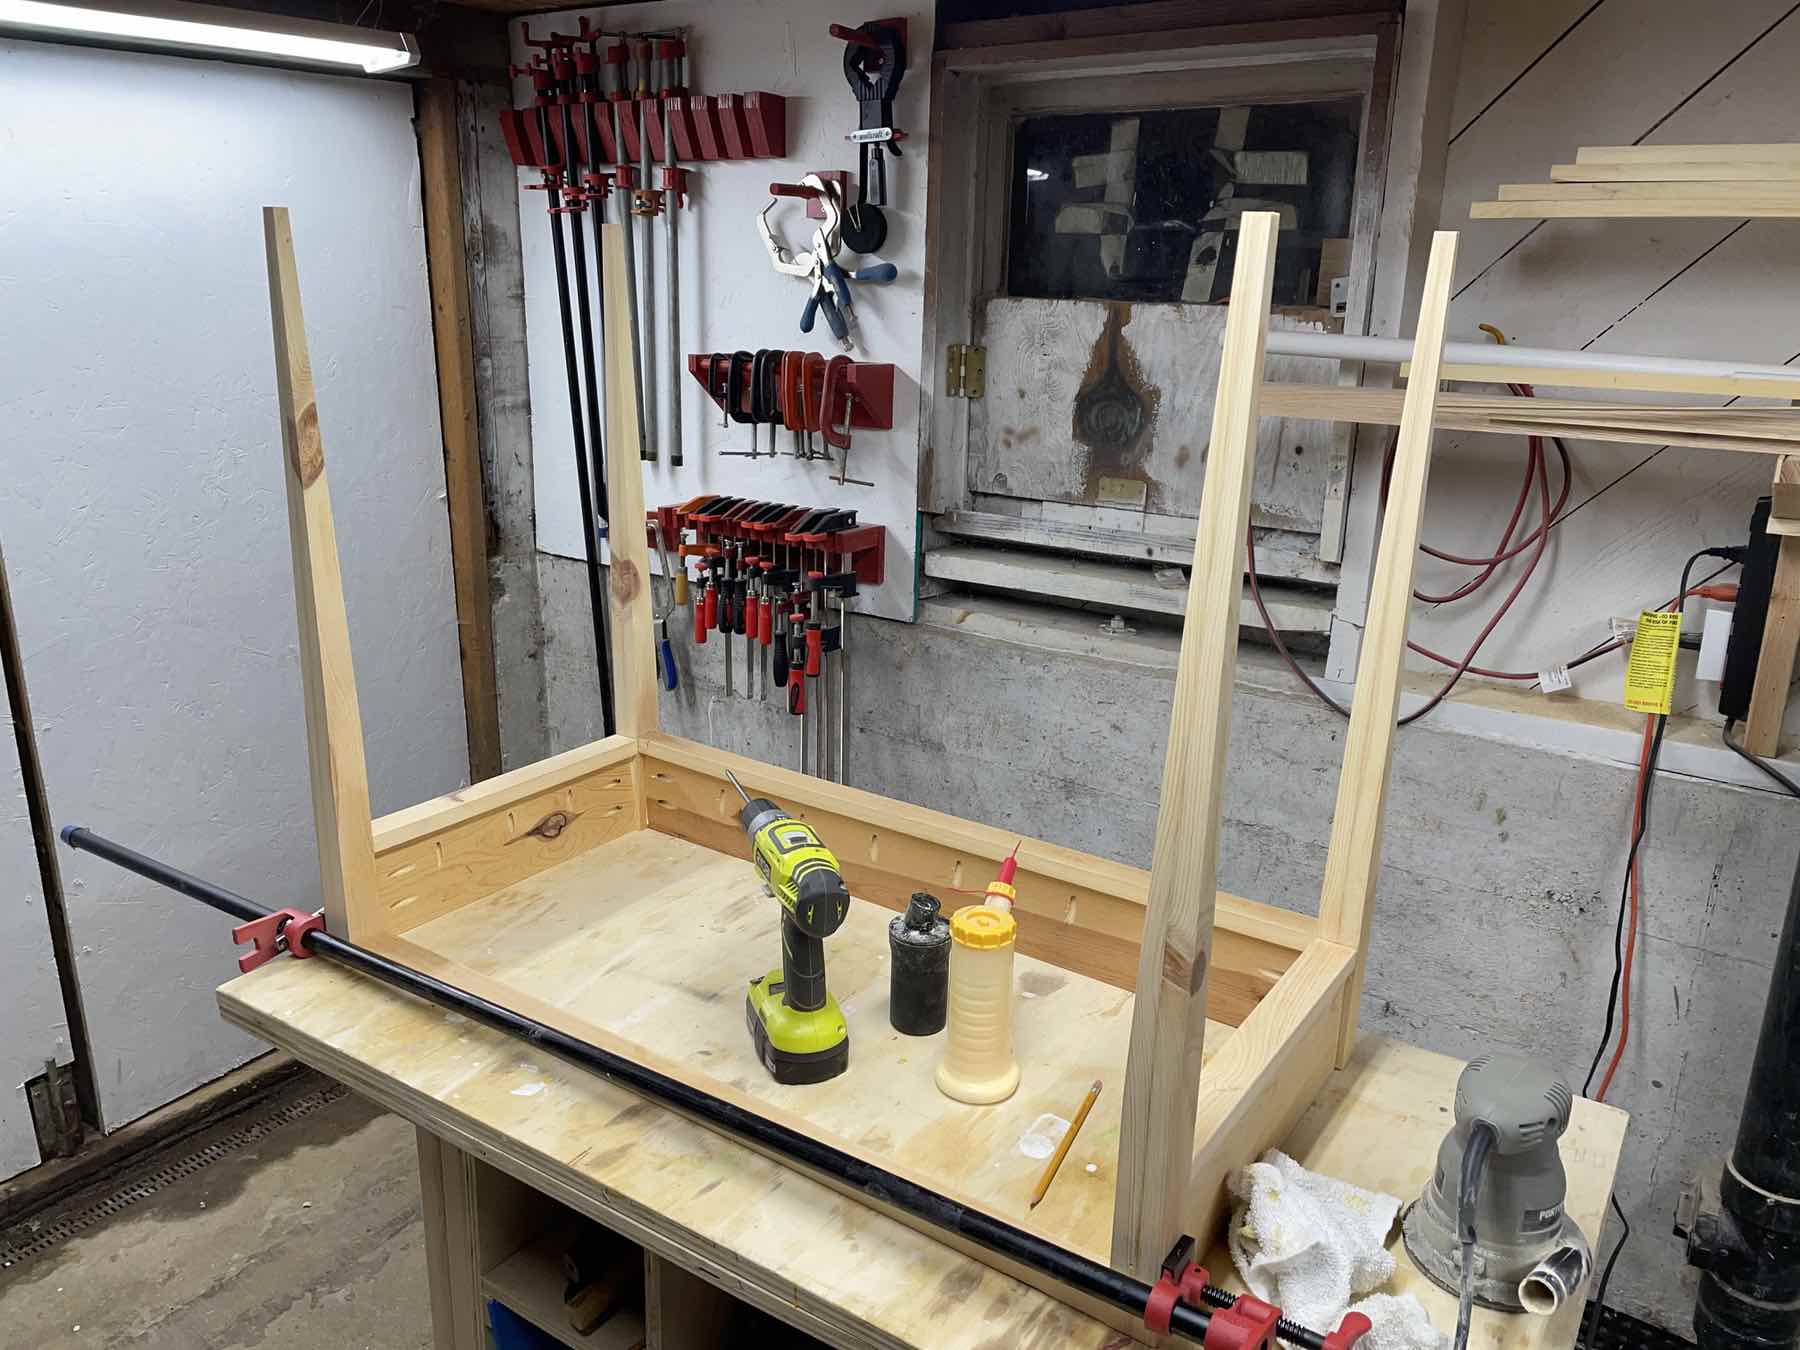
This project had a lot of firsts for me. I’d normally use a lot more plywood on furniture projects like this, but I really wanted to limit myself to the rescued lumber as much as possible. The 1x10s were easy enough to rip down to the right widths on a table saw, though, meaning I could use them almost exclusively.
In the end, I was able to make the legs, the sides and back, the drawer fronts, and the trim entirely from that lumber. I had just enough scrap half-inch plywood in my shop for the drawer boxes. The only new wood I bought was a three-quarter inch baltic burch handy panel for the top. I might have been able to make a panel from the rescued lumber instead, but I was tight on materials and time at that point.
Working with this constraint meant carefully picking and choosing which boards went to which parts of the desk. I’m particularly happy with how the drawer fronts turned out, with the two-tone wood grain action going there.
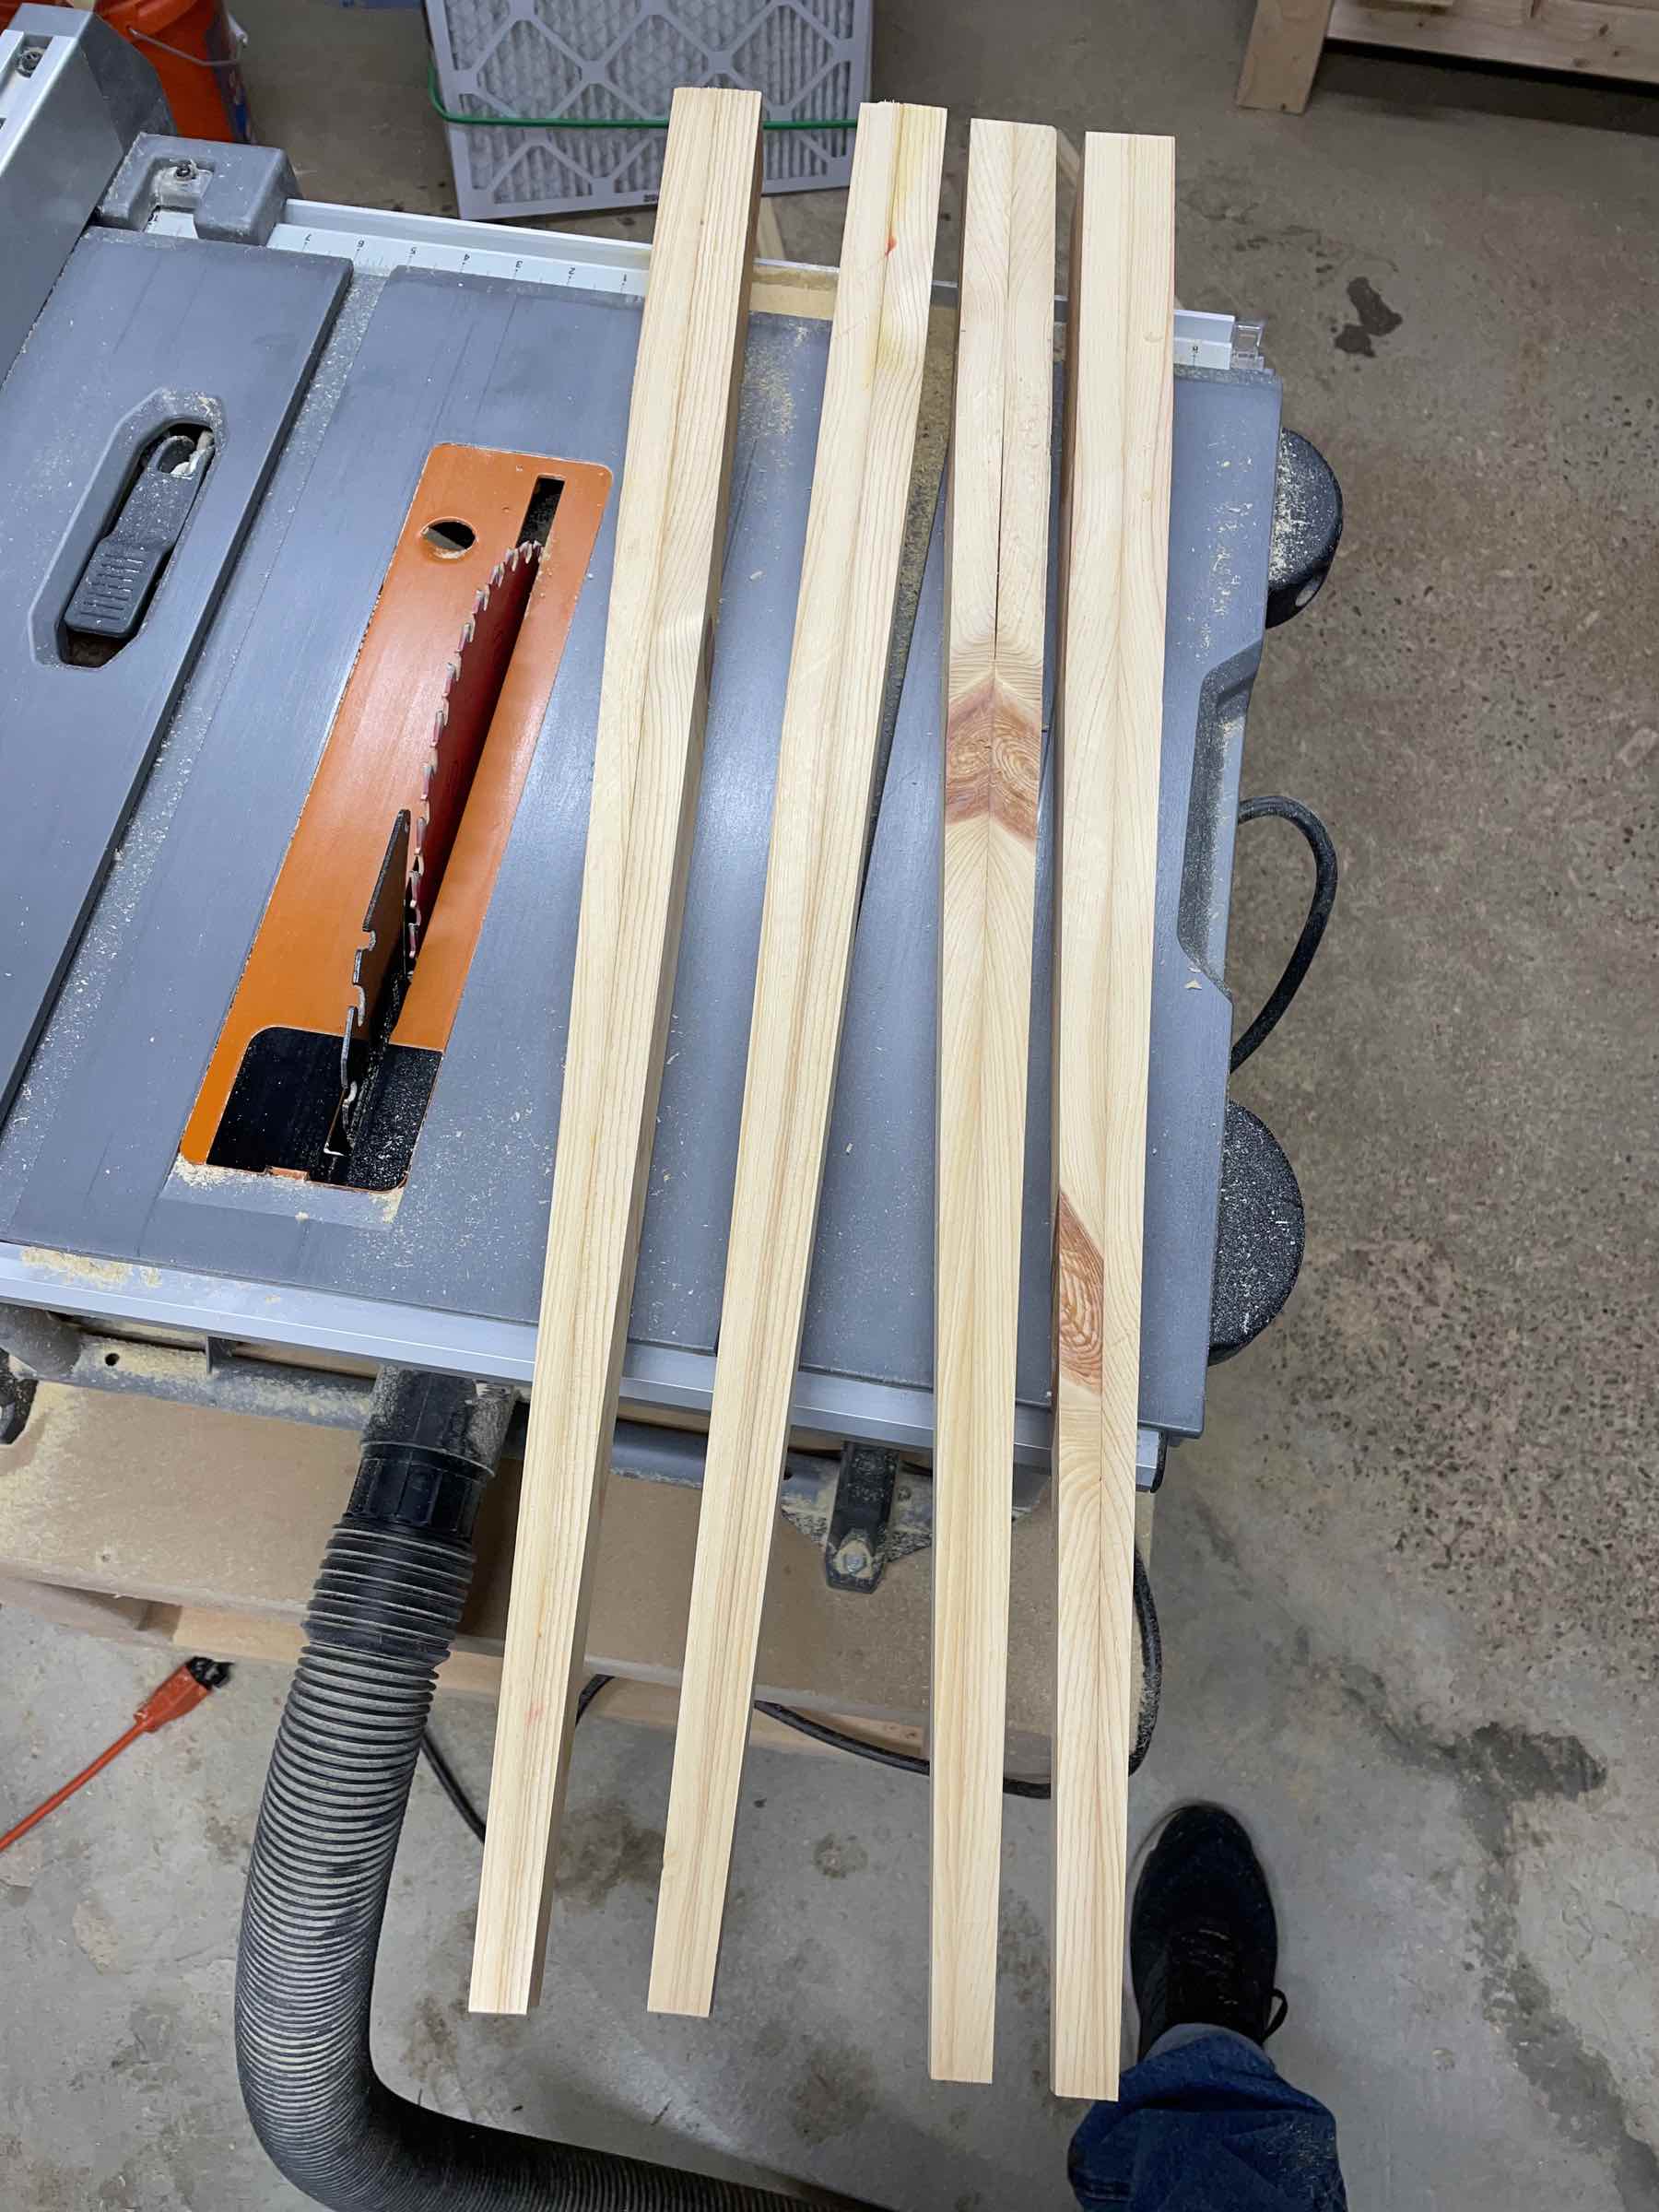
I’d also never done any taper cuts before. I wound up buying a tapering jig from MicroJig for these, rather than building my own jig. It’s not a cheap jig, but I justified it by accounting for the time savings and cost of clamps I would’ve had to buy to build my own. I was also sold by a promotional video showing how to use the jig to cut mid-century-style legs on a router table.
I found the MicroJig to be kind of fussy, though, and ended up having to buy extra parts for the GRR-RIPPER I already had in order to use the jig safely. And even then, it was a little unwieldy on my little table saw. I don’t want to write it off–I know lots of people swear by MicroJig products in general–but I was relieved when I had the tapers cut and could put the jig away. The results were nice, though.
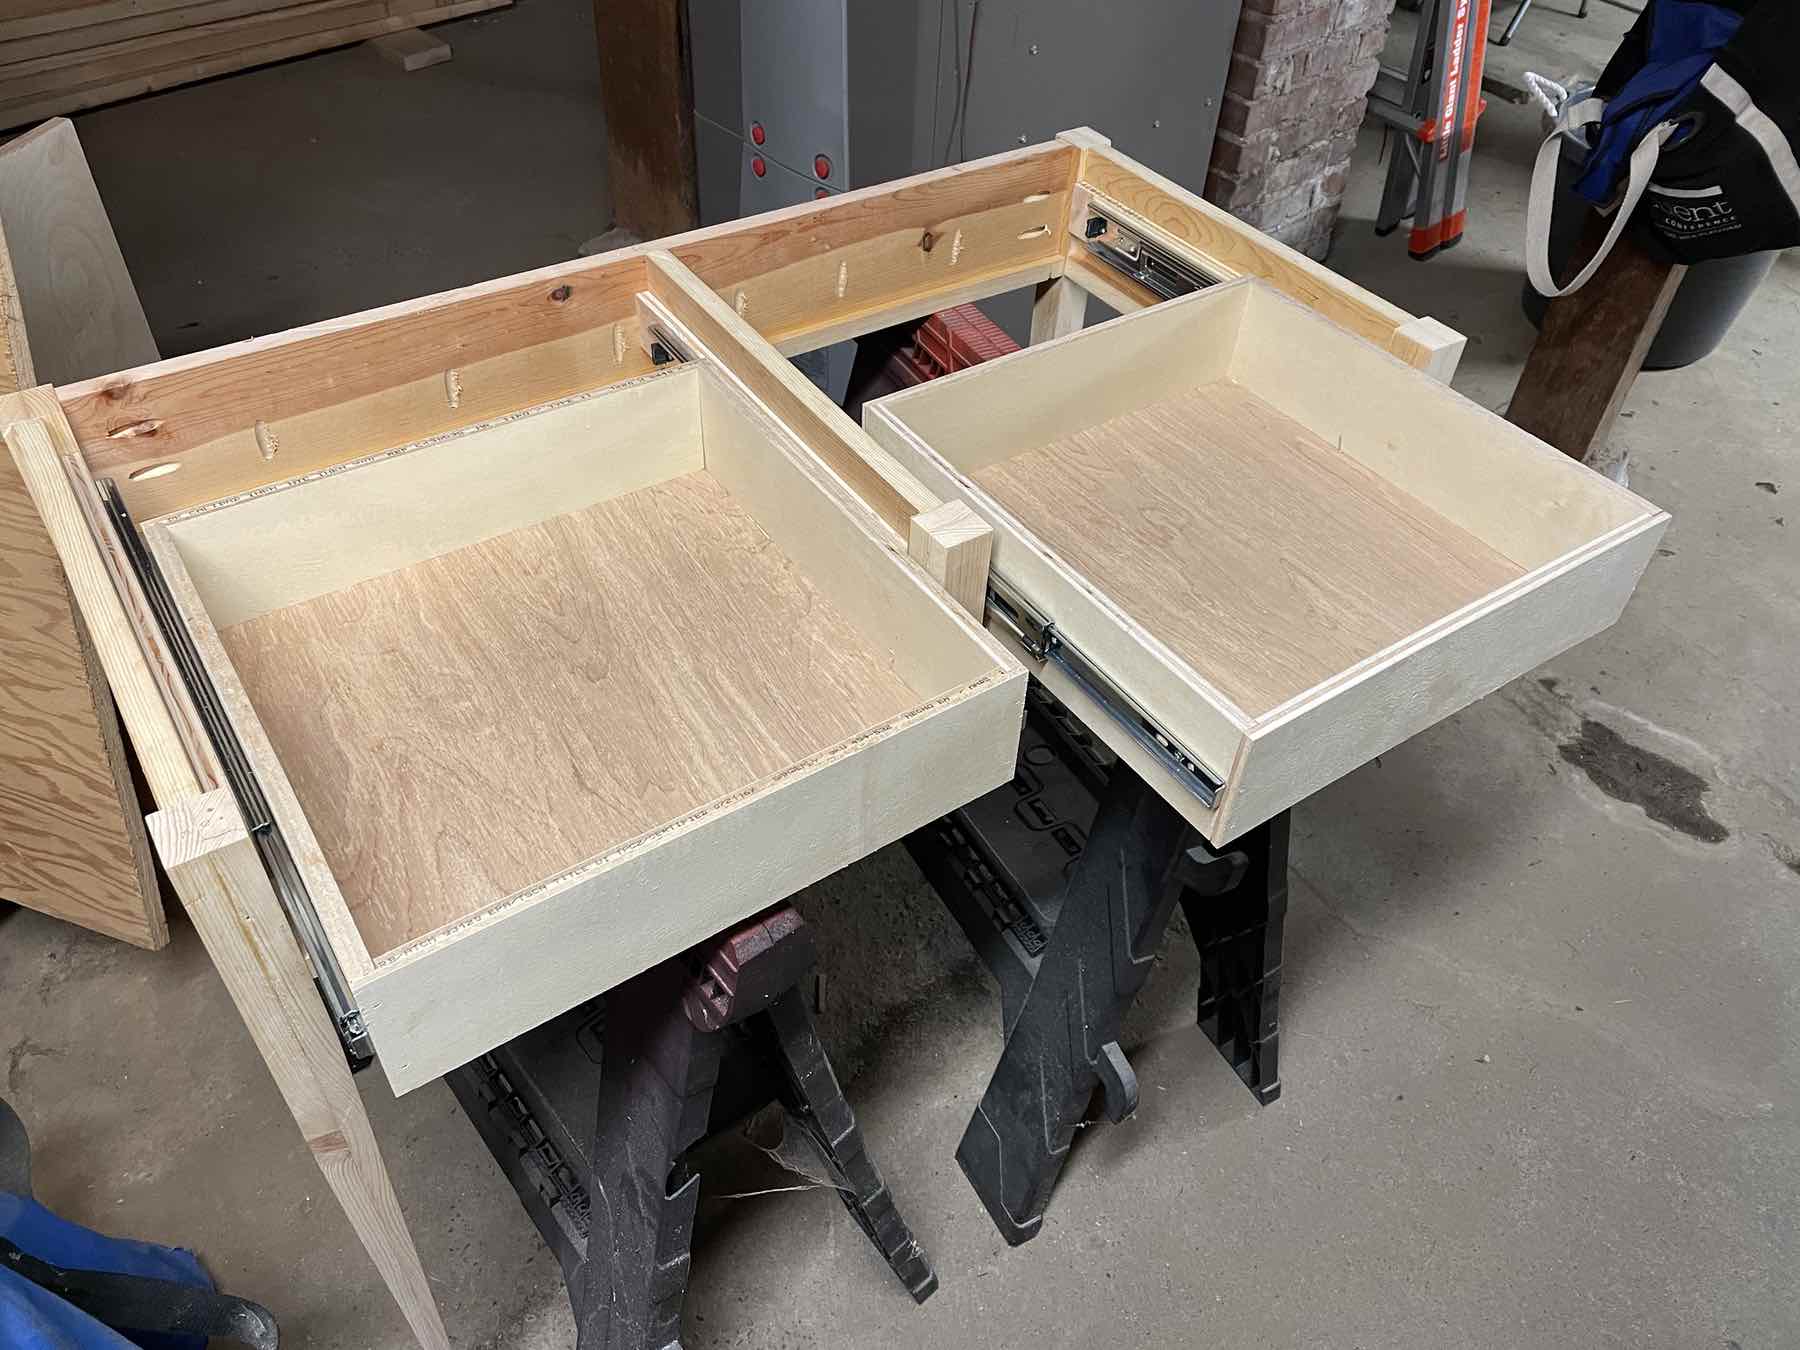
I’ve built projects with drawers before, but this was the first time I put them on runners. I just went with some simple drawer runners from AmazonBasics, and followed Ana White’s method for installing them. I anticipated a lot of fiddling with them, but they actually worked out well! I’ll be using runners on all my future projects with drawers.
Given the wear and tear already present in the repurposed wood, and little flaws here and there that are obvious to me but maybe not anyone else, I was really tempted to just paint the desk and call it good. But my girlfriend really wanted to keep it natural, so I decided to go with spray lacquer for protection, another first for me. After lots (and lots) of sanding, I sprayed four coats of lacquer onto the desk, and, wow. The desk feels more professional than any other piece of furniture I’ve ever built, and I credit the extra time spent on sanding and proper finishing.
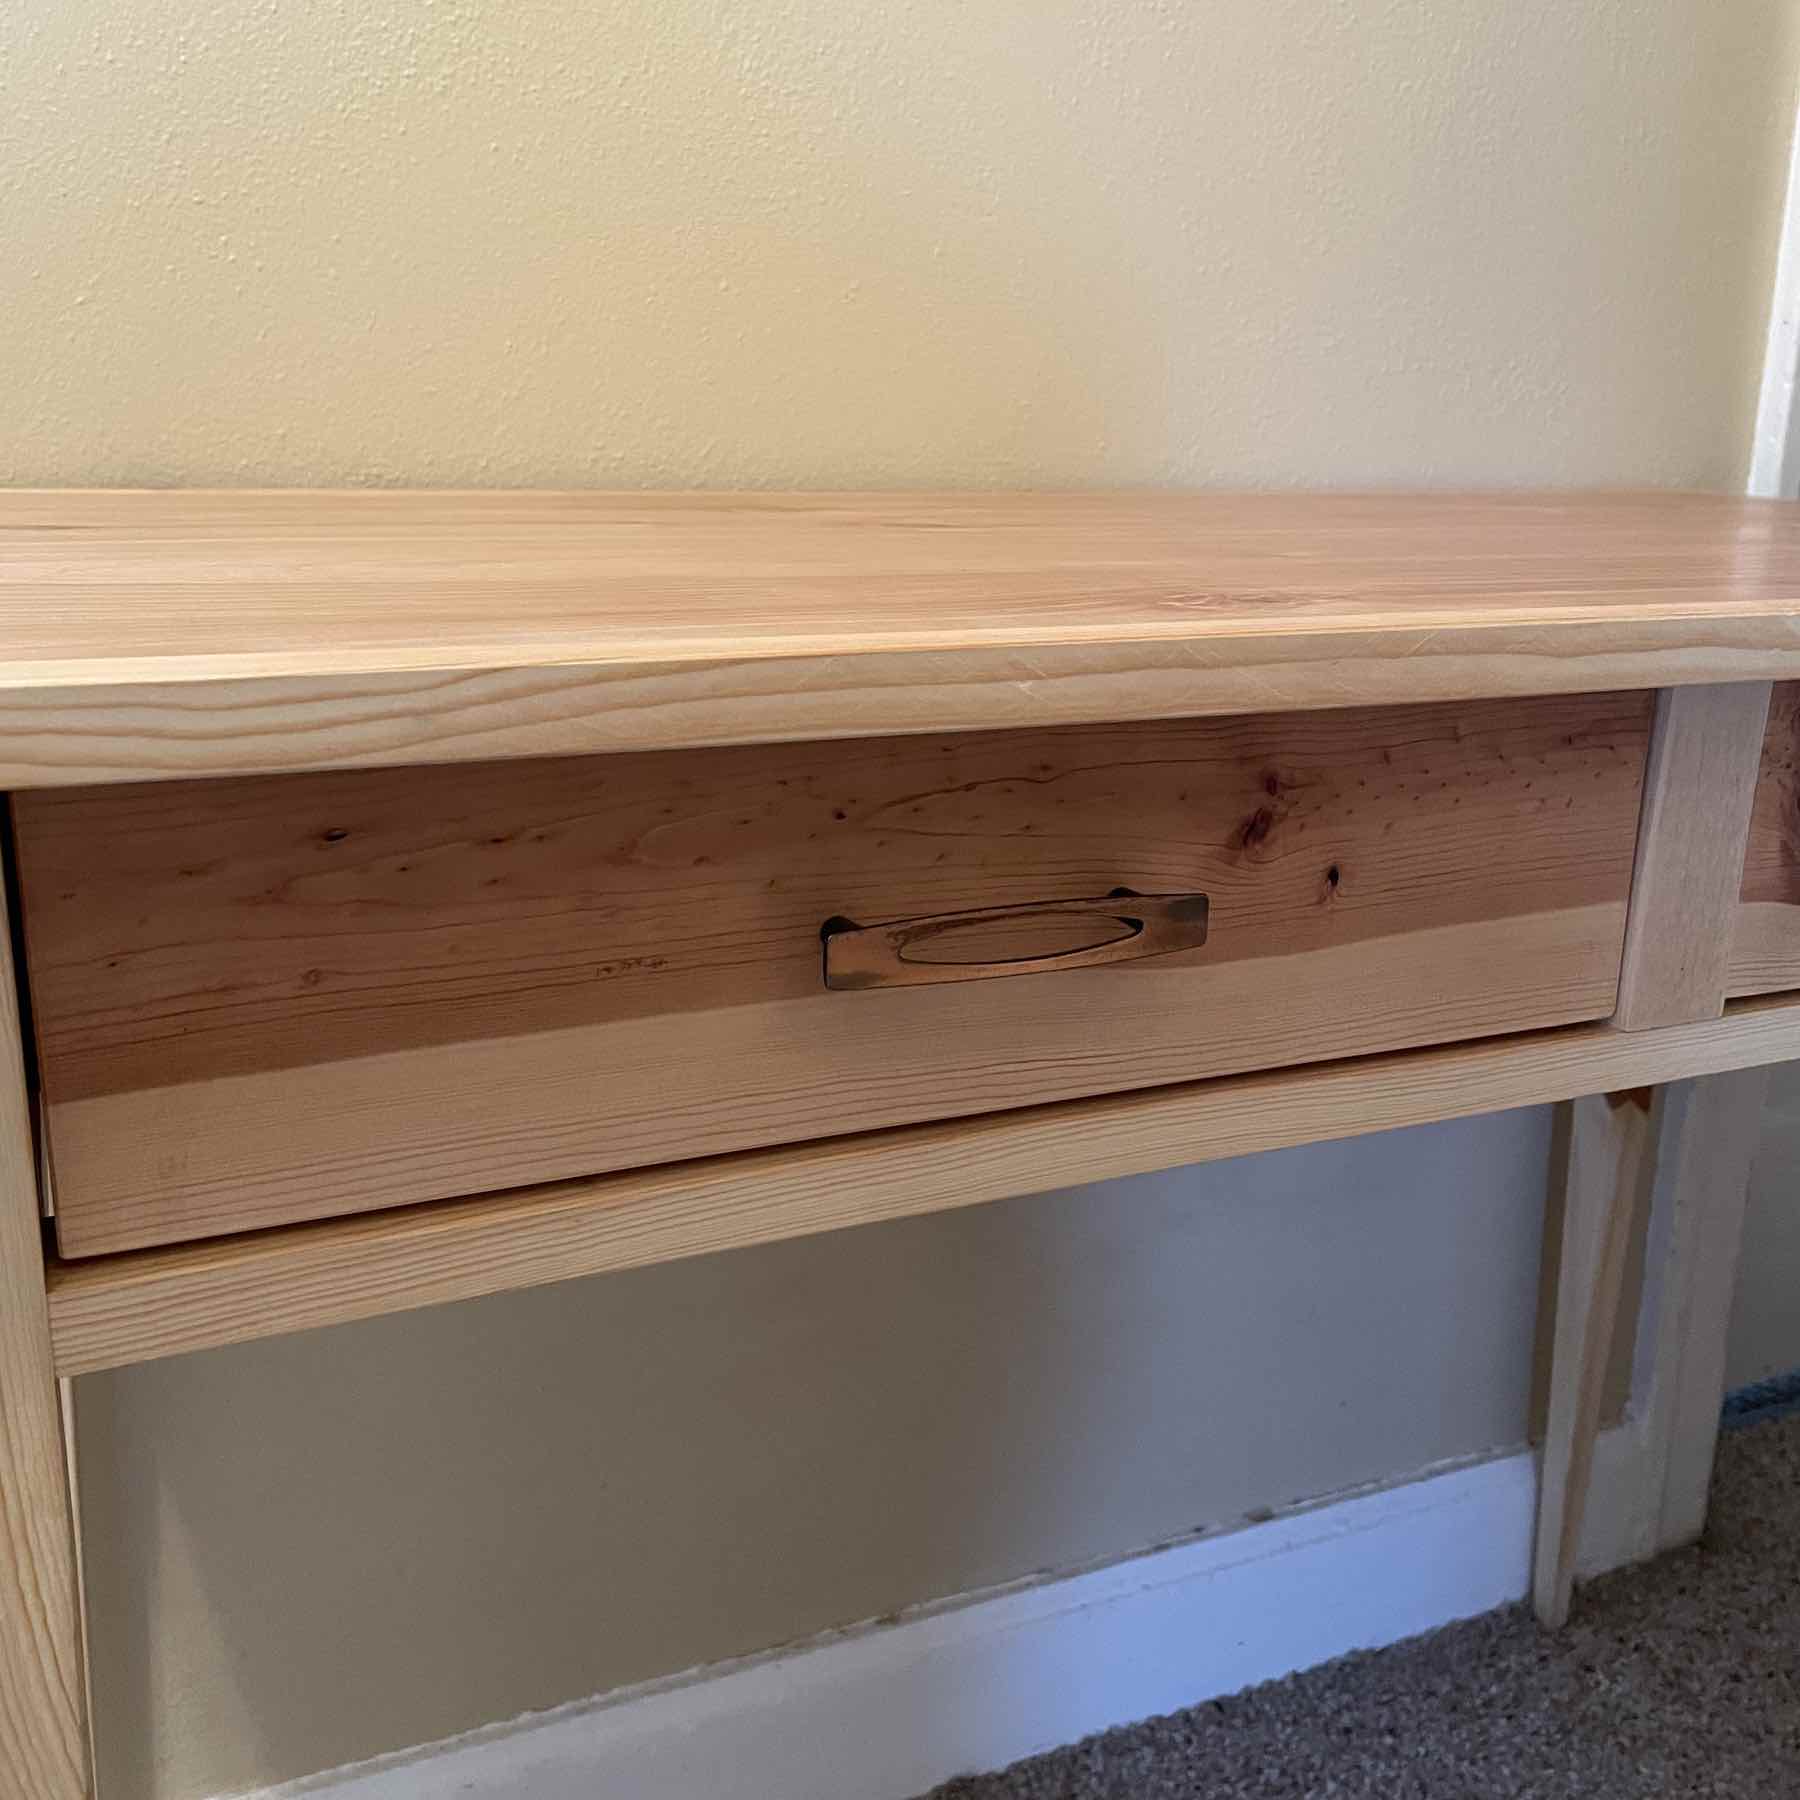
I picked up the vintage drawer pulls awhile back during a visit to Hippo Hardware in Portland. My last time lining up drawer pulls with two screws just right was kind of a drag, so I picked up a Kreg cabinet hardware jig for a few bucks and, like almost everything I’ve ever bought from Kreg, it worked out well.
So, yeah. I’m pretty pleased with how the writing desk turned out, and was glad to see it in use this past week. Definitely my most ambitious woodworking project to date, with lots of firsts and lessons learned for future projects. Big thanks to Steve Ramsey for all the work he’s done over the years on Woodworking for Mere Mortals and the Weekend Woodworker, for giving me the confidence to think I could build something like this, and to K. for inspiring me to actually do it.